使用Python的WerkzeugDeb
这是零基础玩ChatGPT+Python——办公自动化的第11节:利用ChatGPT生成Python代码,批量生成PPT奖状。
教程目的: 初步掌握用ChatGPT批量操作PPT,节省时间
阅读对象: 需要用ChatGPT提高工作效率、摆脱重复无聊工作、无Python基础、或Python入门者。
场景:
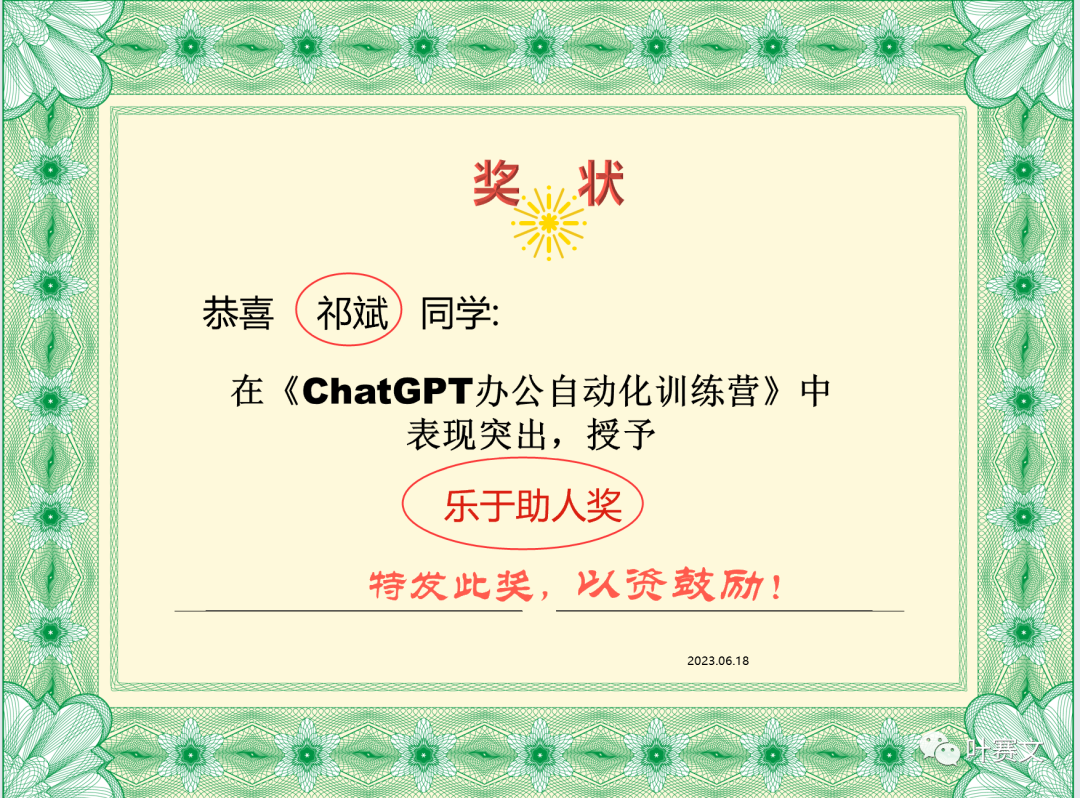
为活跃社群,要给社群里的50个小伙伴,发放电子奖状。
需要制作50个PPT奖状。
奖状的格式相同,但是姓名与奖项不同。
使用ChatGPT前: 一个个设置PPT,分别替换姓名和奖项。至少需要10分钟。
使用ChatGPT后: 写好提示词,让ChatGPT生成Python代码,批量修改PPT,不到10秒搞定。
一、软件准备
1.1 ChatGPT账号。
如果没有账号,嫌麻烦,可以在银河录像局的“AI百宝箱”里购买: https://nf.video/yinhe/web?sharedId=127297
也可以自己免费注册: http://yesaiwen.com/chatgpt-plus-register-yourself/
1.2 vscode:免费。 参考安装教程: http://yesaiwen.com/how-to-use-chatgpt-coding-python/
二、素材准备
在下面的这个链接里,找到相应的素材地址,下载并解压:
http://yesaiwen.com/chatgpt-python-resources/
练习素材内容:
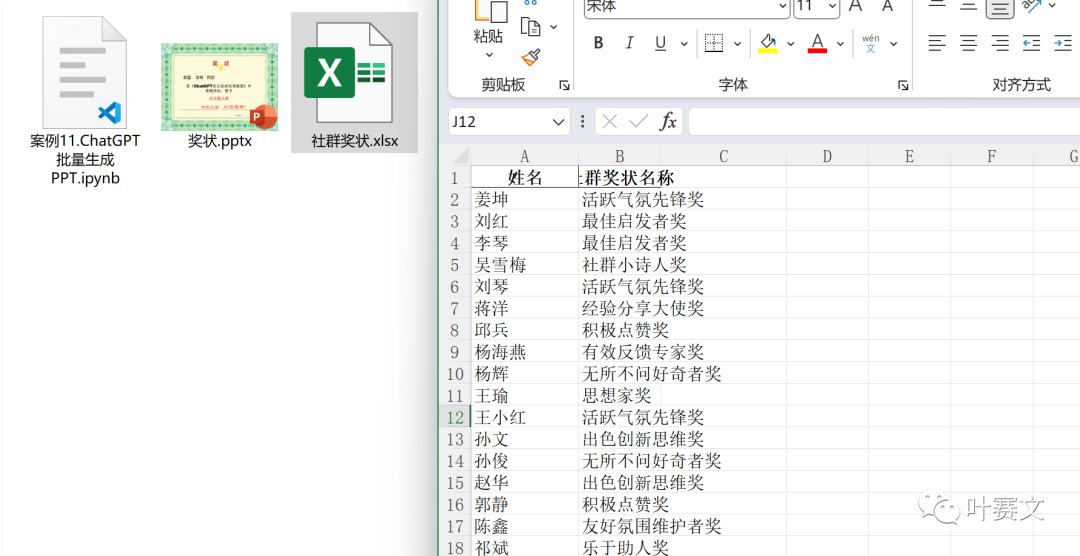
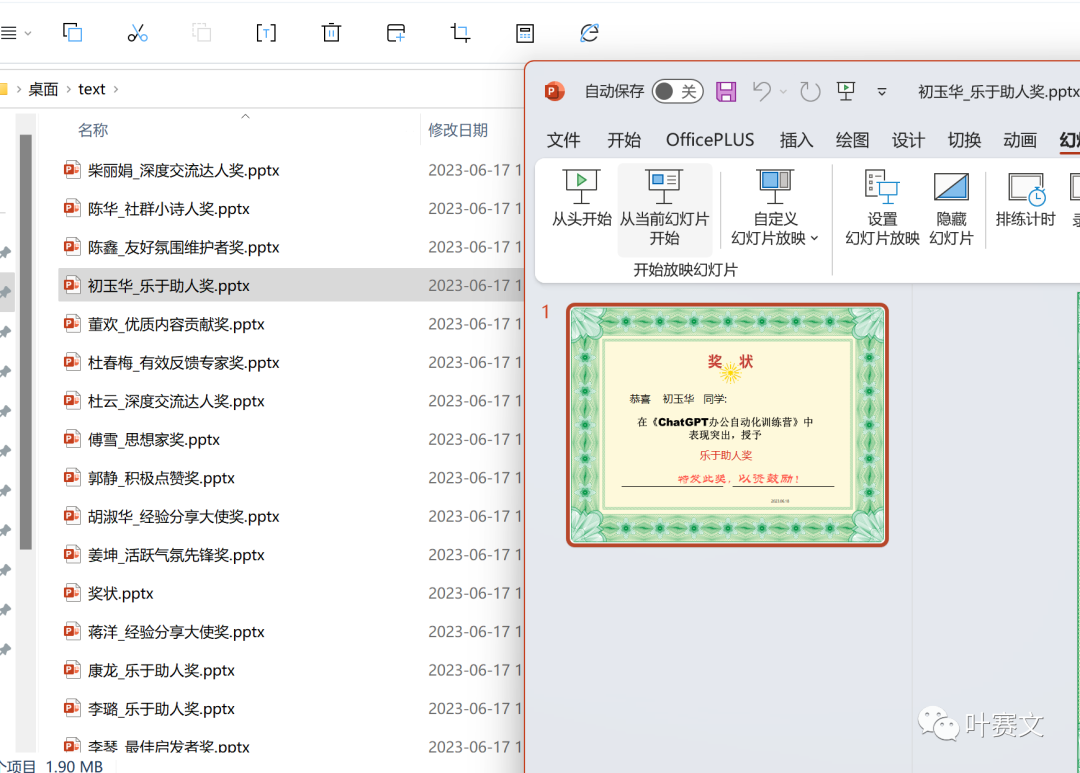
一个奖状的PPT模板,一个Excel表格,里面包含50个姓名及对应的奖状名称。
下载后,解压,获得文件及文件夹的位置。例如:
<!DOCTYPE html><html lang=”en”> <head> <meta charset=”UTF-8″> <title>requests.exceptions.JSONDecodeError: Expecting value: line 1 column 1 (char 0) // Werkzeug Debugger</title> <link rel=”stylesheet” href=”?__debugger__=yes”> </head> <body> <h1>Error:</h1> <p>The error message is:</p> <p> <img src=”?__debugger__=yes” alt=”Debugger”> </p> <p>To diagnose the issue, you can use the Werkzeug Debugger.</p> <p> <script src=”?__debugger__=yes”></script> </p> </body></html>
三、操作步骤
安装模块
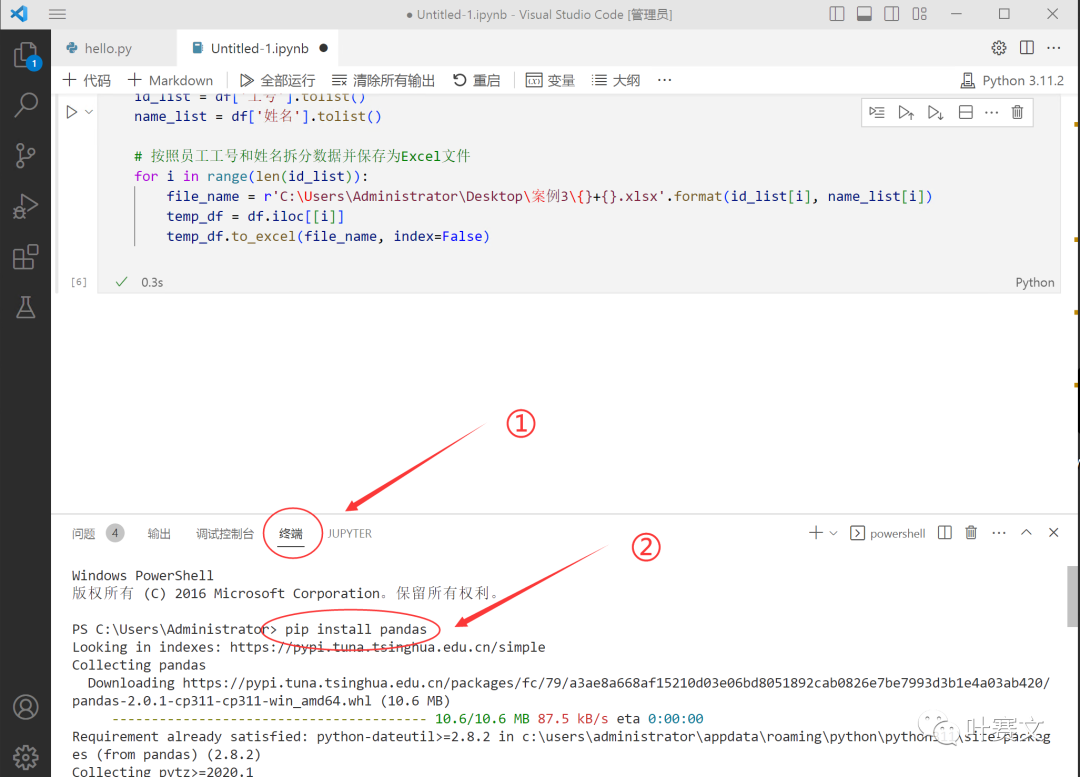
首先需要在vscode里,安装2个模块。 在vscode的终端里,输入这1个命令,后按回车:
pip install python-pptx pandas
3.1.打开ChatGPT,输入提示词
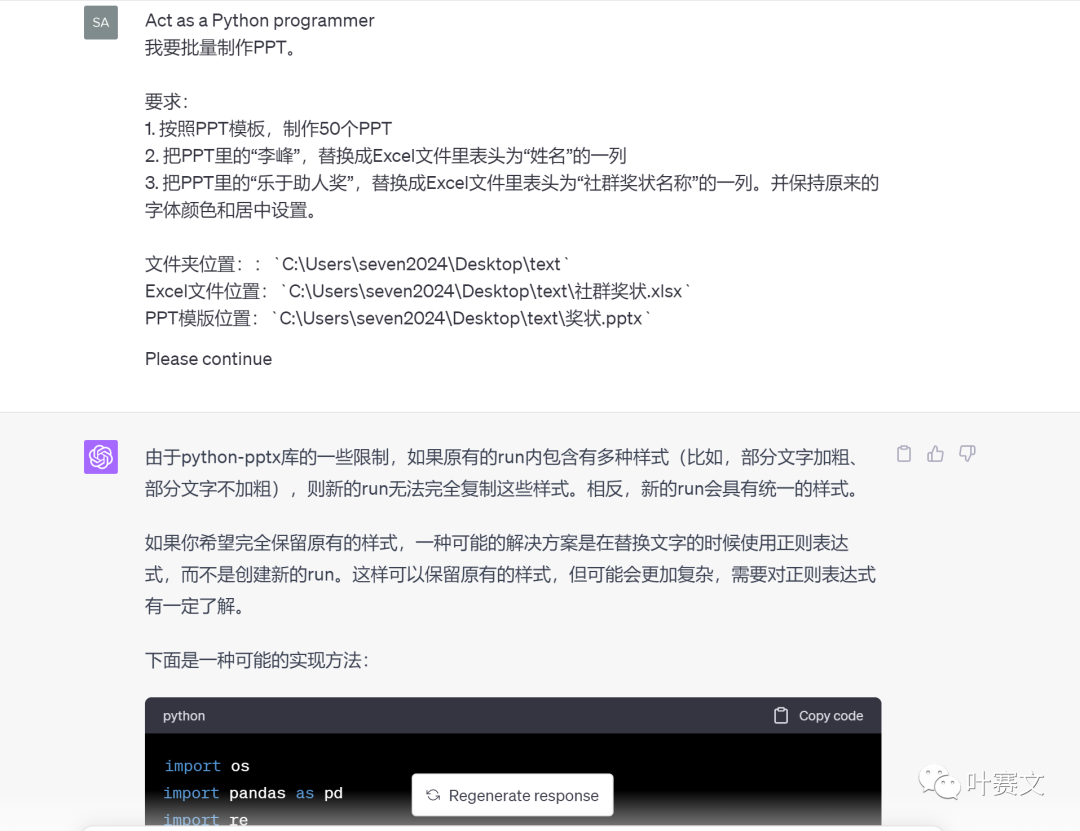
Act as a Python programmer
我要批量制作PPT。
要求:
1. 按照PPT模板,制作50个PPT
2. 把PPT里的“李峰”,替换成Excel文件里表头为“姓名”的一列
3. 把PPT里的“乐于助人奖”,替换成Excel文件里表头为“社群奖状名称”的一列。并保持原来的字体颜色和居中设置。
文件夹位置::`C:\Users\seven2024\Desktop\text`
Excel文件位置:`C:\Users\seven2024\Desktop\text\社群奖状.xlsx`
PPT模版位置:`C:\Users\seven2024\Desktop\text\奖状.pptx`
这里用的是plus
3.2.复制代码,并粘贴到vscode里
在vscode里,新建一个jupyter文件:
① 复制ChatGPT里给出的代码,粘贴到vscode里
② 点击“运行”
③ 当下面出现绿勾时,说明代码运行成功。
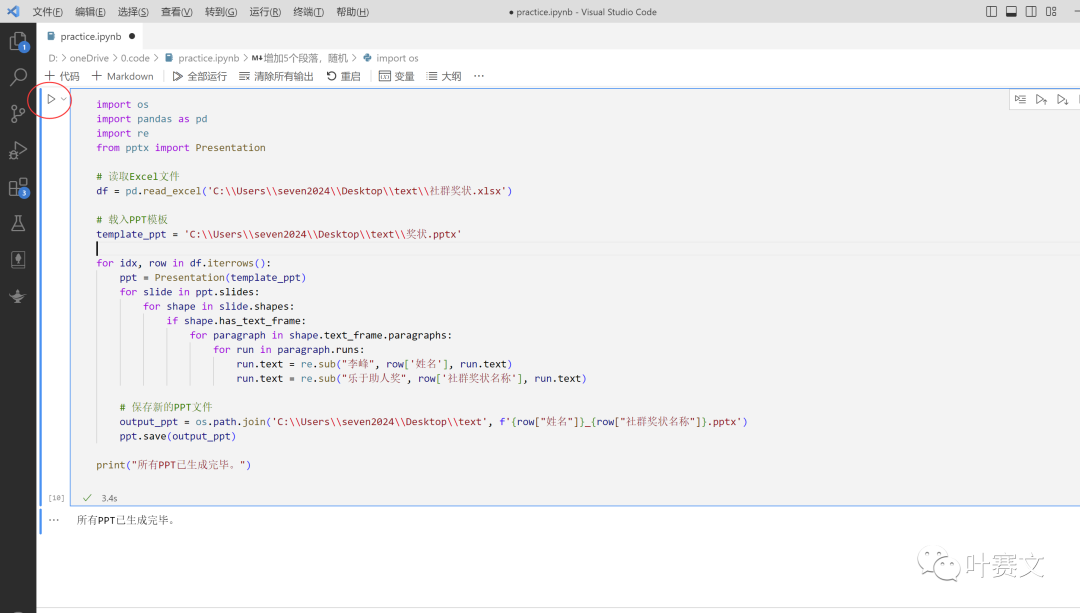
3.3 检查结果
用时3.4秒,生成了50个PPT电子奖状。
四、小结
4.1 出现错误的处理流程
实验了7次,最终才获得自己想要的效果。
替换PPT的文本,很简单,第一次就成功了。 麻烦的是:如何保证格式和原文格式一样。
重新组织后的内容:<html lang=en> <head> <title>requests.exceptions.ConnectionError: HTTPConnectionPool(host=’127.0.0.1′, port=7861): Max retries exceeded with url: /chat (Caused by NewConnectionError(‘<urllib3.connection.HTTPConnection object at 0x00000176ECA7FDC0>: Failed to establish a new connection: [WinError 10061] 由于目标计算机积极拒绝,无法连接。’)) // Werkzeug Debugger</title> <link rel=”stylesheet” href=”?__debugger__=yes” /> </head> <body> <h1>Error: requests.exceptions.ConnectionError: HTTPConnectionPool(host=’127.0.0.1′, port=7861): Max retries exceeded with url: /chat (Caused by NewConnectionError(‘<urllib3.connection.HTTPConnection object at 0x00000176ECA7FDC0>: Failed to establish a new connection: [WinError 10061] 由于目标计算机积极拒绝,无法连接。’))</h1> <p>This error message indicates that there was a problem establishing a connection to the server.</p> <p>To fix this error, you can try to change the IP address or port number of the server you are trying to connect to.</p> <p>You can also try to use a different server or a different method to connect to the server.</p> <p>If you are using Werkzeug, you can also try to set the __debugger__ variable to yes to get the Werkzeug Debugger to work.</p> <p>If you are using Python, you can also try to use theDebugger by setting the __Debugger__ variable to yes.</p> </body></html>